
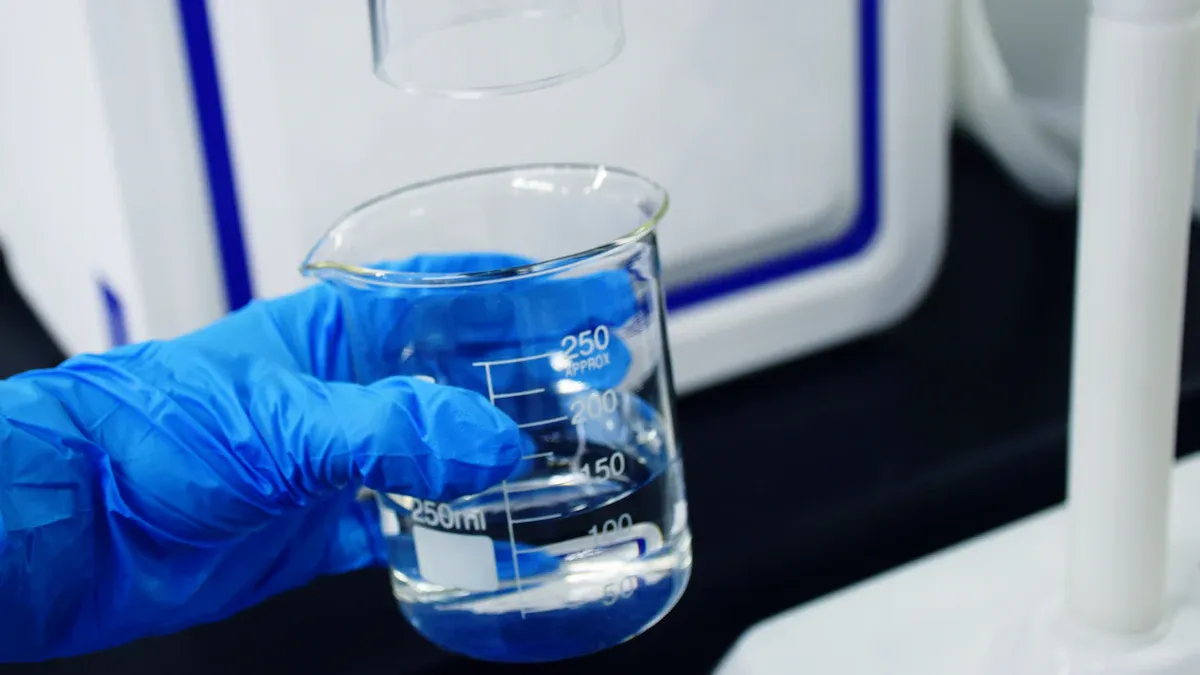
You can easily use a portable multi-parameter water quality analyzer. First, get your equipment ready and check the batteries. Calibrate the sensors before you take water samples. Use the portable analyzer at the site and write down your results. New devices make portable multi-parameter water quality analyzer field testing quick and easy. You will get correct quality readings every time.
-
Tip: Follow each step carefully to get good water data.
Key Takeaways
-
Get your analyzer ready by checking the batteries. Make sure to calibrate the sensors. Pack all the supplies you need before you go out to test.
-
Pick places that are safe and easy to get to for testing. Always use the same spot and depth each time. This helps you get water quality data that matches.
-
Clean the sensors before you take each sample. Clean them again after you finish. This stops contamination and helps you get correct readings.
-
Write down all your data with care. Include the date, time, place, and calibration details. This helps you keep good water quality records.
-
Do regular maintenance and calibration to stop mistakes. This keeps your analyzer working well and gives you reliable results.
What Is a Portable Multi-parameter Water Quality Analyzer?
Key Features
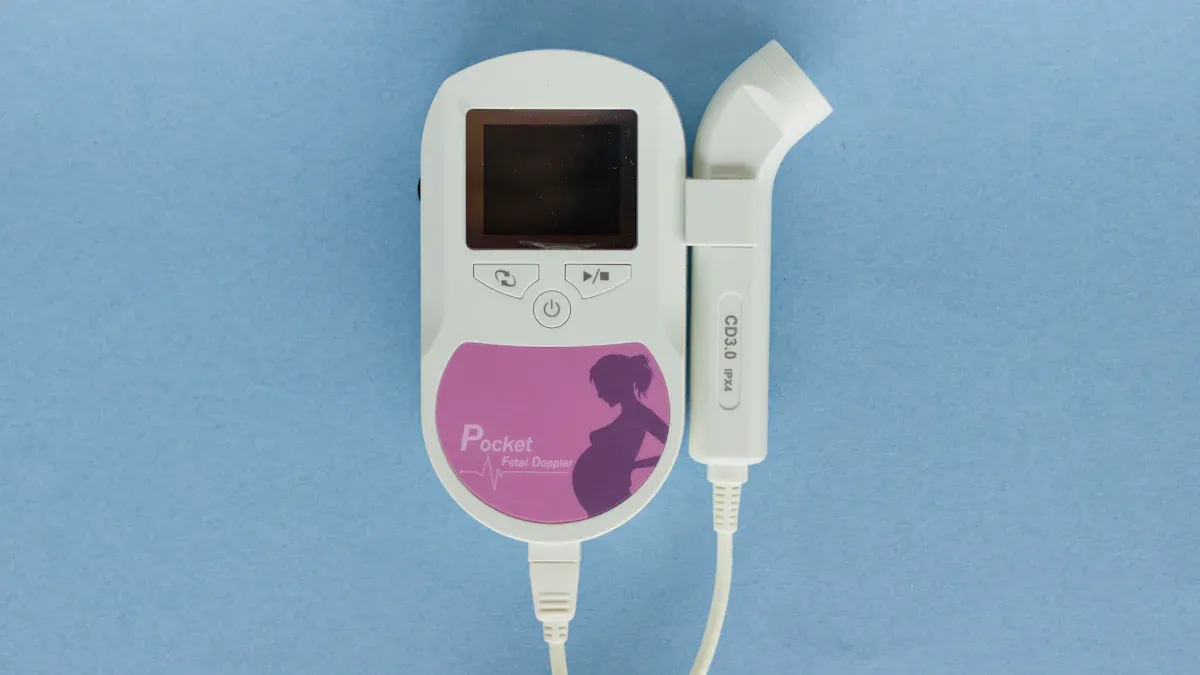
A portable multi-parameter water quality analyzer can check many things in water at the same time. You can take it anywhere because it is small and shaped like a pen. Most analyzers have a titanium alloy probe. This makes them tough and helps them give correct results. The digital LCD screen with a backlight lets you see numbers even when it is dark. You can change modes to test pH, ORP, hydrogen concentration, or temperature. The analyzer has a smart chip. This chip helps it work well and gives you exact results. Automatic temperature compensation (ATC) changes readings if the water gets warmer or colder. This keeps your results right. The waterproof rating, like IP67, means you can use it in wet places and not worry about damage.
| Component/Feature | Description |
|---|---|
| Measurement Parameters | pH, ORP, H2, Temperature |
| Probe Material | Titanium alloy for durability and accuracy |
| Intelligent Chip | Stable performance and high accuracy |
| Automatic Temperature Compensation (ATC) | Maintains accuracy in changing temperatures |
| Waterproof Rating | IP67 for field durability |
| Display | Digital LCD with backlight |
| Design | Compact, pen-shaped for portability |
| Mode Switching | Switch between pH, ORP, H2, Temperature |
Parameters Measured
You can use a portable analyzer to test many important things in water. These include pH, dissolved oxygen, chemical oxygen demand (COD), oxidation-reduction potential (ORP), chlorophyll, blue-green algae, and dissolved ozone. Many analyzers also measure turbidity. Turbidity shows if water is clear or cloudy. These tools help with drinking water and wastewater treatment. Some analyzers work as portable photometers. They give fast and correct results right where you are.
-
Common parameters measured:
-
pH
-
Dissolved Oxygen
-
Chemical Oxygen Demand (COD)
-
Oxidation-Reduction Potential (ORP)
-
Chlorophyll
-
Blue-Green Algae
-
Dissolved Ozone
-
Turbidity measurement
Field Applications
Portable multi-parameter water quality analyzers are used in many places. Environmental teams use them in wetlands, lakes, rivers, and oceans. They help find changes and problems in nature. Drinking water plants use these tools to keep water safe for people. Wastewater plants use them to check for pollution and follow rules. Food and drink companies use portable photometers for quick checks. Electronics companies test water to stop scaling and protect machines. Stormwater teams use analyzers to watch runoff and help the environment. These devices let you act fast when water changes. They help keep people and nature safe.
Tip: Always use turbidity measurement to look for particles in water when you test in the field. This is needed for both drinking water and wastewater treatment.
Getting Ready for Field Testing
Checking Equipment
Check your analyzer before you leave home. Look at the battery level. Always use new batteries for each trip. Take out the batteries if you will store the analyzer. This stops leaks. Look at all cables and sensor connections. Make sure nothing is cracked or loose. Check the waterproof case for any damage. A strong case keeps your analyzer safe from water. Many analyzers have plug-and-play digital sensors. You can change these sensors fast if needed. This makes fixing things easy and saves time.
Tip: Test your analyzer at home before you go. This helps you find problems early.
Calibrating Sensors
Calibrate your sensors before every field test. This step gives you correct results. Most companies say to calibrate sensors about once a month. Monthly calibration keeps your analyzer working well. It also fixes sensor drift that happens over time. This is very important for conductivity sensors and TDS meters. Follow the steps in your user manual for each sensor. Use the calibration solutions that come with your analyzer. If you skip calibration, your readings might be wrong.
Packing Supplies
Pack everything you need for a good field test. Here is a simple checklist:
-
Portable multi-parameter analyzer
-
Fresh batteries or a power bank
-
Calibration solutions
-
Clean sample bottles
-
Gloves and safety glasses
-
Waterproof case
-
Notebook or digital device for notes
-
Portable photometer (if you need to test extra parameters)
-
Spare sensors and cables
Note: Bring extra supplies in case something breaks or gets lost. Being ready helps you get good water data every time.
Portable Multi-parameter Water Quality Analyzer Field Testing Steps
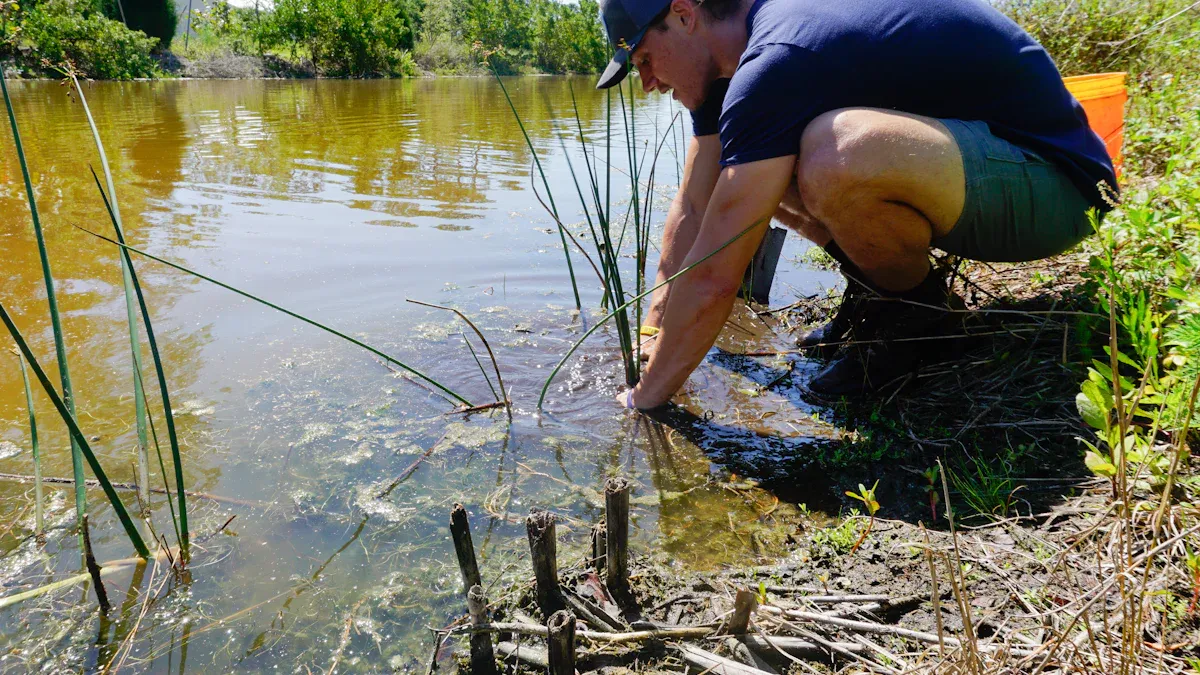
Site Selection
Pick your testing spot with care. A good spot helps you get water data that shows what is really happening. Choose a place you can reach easily. This lets you visit often. Make sure the area is safe for you and your equipment. Always ask for permission before you test. Use the same spot and depth every time. This keeps your data the same. If you skip these steps, you might miss changes in water quality. Things like temperature and turbidity at your site can change how often you need to check your analyzer and how long you can leave it there.
-
Picking the right spot makes your data correct.
-
Easy-to-reach places help you check your gear often.
-
Safe spots protect your analyzer from harm.
-
Using the same spot and depth helps you compare results.
-
High turbidity or warm water means you need more maintenance.
Tip: Check the weather and water before you go. This helps you stay safe and get good results when you test with your portable multi-parameter water quality analyzer.
Sample Collection
When you collect water samples, keep them clean. Clean your sensors and tube before and after you use them. This stops germs and dirt from messing up your results. Stick to a regular cleaning plan. Look for damage and clean all parts, even solar panels. Change desiccants to keep your analyzer dry.
Follow these steps for best results:
-
Rinse your sensors with clean water before and after each sample. This stops mixing between sites.
-
Use clean bottles and gloves to keep samples pure.
-
Check the whole site and your gear to make sure everything works.
-
Take photos and write notes about your site and anything strange.
Note: Test your water right after you collect it. Waiting too long can change the water and make your results wrong.
Analyzer Operation
Modern analyzers are easy to use. Most have LCD screens and touch controls. Some let you pick from nine languages. This helps teams from different places use them. The small size makes it easy to carry your analyzer anywhere.
| Feature Category | Description & Impact on Field Testing Efficiency |
|---|---|
| User Interface | LCD screens and touch controls make things simple and help you avoid mistakes. |
| Multilingual Support | Many language choices help more people use the analyzer. |
| Portability & Design | Small and light analyzers are easy to carry and use. |
| Data Management | Big storage and built-in printers let you save and print results fast. |
| Testing Speed & Throughput | Fast testing lets you finish your work quickly. |
To start, turn on your analyzer. Pick what you want to measure, like pH or turbidity measurement. Put the probe in the water at the right depth. Wait for the numbers to stop changing. Rinse your sensors between samples so you do not mix data. If you test turbidity, make sure the water is still.
Tip: Use automatic temperature compensation to get correct readings even if the water gets warmer or colder.
Data Recording
Writing down your data is very important. Write the date, time, place, and all the things you measure. Many analyzers can save thousands of results and print them right away. Some can send your data to apps or the cloud. This keeps your records safe and easy to find.
-
Use notebooks, digital devices, or built-in storage to save your results.
-
Take photos of your site and gear to help track your work.
-
Write down calibration values, cleaning notes, and any problems.
-
Use cloud platforms or apps to manage your data quickly and safely.
-
Blockchain and AI tools can help you follow your water data and see patterns.
Note: Good notes help you explain changes in your results and keep your water records trustworthy.
Ensuring Accurate Results
Best Practices
You can get good results by following smart steps. First, set clear goals for your water tests. Pick how long you want to test. Use copper mesh or sensor wipers to keep sensors clean. Before you start, check everything:
-
Calibrate each sensor with trusted standards.
-
Write down starting measurements.
-
Check battery health with a voltmeter.
-
Record serial numbers and settings.
-
Make sure your analyzer talks to your data logger.
After calibration, put your instrument in an aerated bath overnight. This helps you check if sensors work well. Keep a regular cleaning schedule. Clean sensors, tubes, and solar panels often. Change or charge batteries when needed. Recalibrate sensors or swap sondes if you see drift. Write notes and take photos every time you visit the site. Look at the site to stop clogged tubes or dirty solar panels. These steps help you get good data for drinking water and wastewater treatment.
Tip: Good notes and cleaning help you keep your data right for a long time.
Mistakes to Avoid
Some mistakes can make your results wrong. Try not to do these things:
-
Use dirty or broken sensors, like cracked tips or dirty cells.
-
Forget to clean sensors with the right solutions.
-
Use old or broken probes without changing them.
-
Forget to check temperature compensation.
-
Leave cable connections loose or broken.
-
Ignore checks and signals from your analyzer.
-
Let water, rust, or chemicals hurt your analyzer.
-
Handle calibrators badly or forget battery checks.
-
Miss checking the case, labels, or seals.
If you avoid these mistakes, your water data will be better for drinking water and wastewater treatment.
| Mistake | Impact on Results |
|---|---|
| Skipping calibration | Causes measurement drift |
| Dirty/damaged sensors | Leads to false readings |
| Poor cleaning | Increases contamination |
| Old probes | Reduces measurement quality |
| Bad cable connections | Affects signal integrity |
Troubleshooting
If your analyzer gives strange or wrong numbers, you can fix most problems easily. Calibrate your meter again, especially if you have not used it for a while. Clean electrodes with distilled water. For tough dirt, use a gentle cleaning solution or a soft brush made for pH or EC probes. Store electrodes in KCL solution or distilled water when not using them. Never put the main unit in water. Wipe it with a soft, dry cloth. If numbers are still wrong, check for dirty electrodes or try calibrating again. Do a 3-point calibration to fix accuracy. These steps help you keep good results for drinking water and wastewater treatment.
Note: Cleaning and calibration often fix analyzer problems fast.
Interpreting Data
Understanding Parameters
You need to know what each number means. First, decide why you are testing the water. Choose the water quality parameters that fit your goal, like checking for pollution or safety. Before you collect data, check your sensors and calibrate them with trusted standards. Keep your equipment clean and write down everything you do in the field. This helps you understand your results and find any problems.
-
Decide your goals and pick the right water quality parameters.
-
Calibrate sensors and check your equipment before you begin.
-
Clean sensors and use anti-fouling tools to keep them working well.
-
Write down all your field work, like site details and calibration values.
-
Change how often you visit your site if the water is dirty or your equipment is old.
-
After testing, rinse and store your analyzer the right way.
Tip: Good notes help you see changes in water quality over time.
Making Decisions
You can use your data to make smart choices for the environment and people’s health. Portable analyzers give you fast results for things like pH, dissolved oxygen, and turbidity. These numbers help you find pollution, watch for changes, and know when to act. If you connect your analyzer to the cloud, you can get alerts and share your results quickly. This helps you protect rivers, lakes, and people who use the water. You can also use your results to help clean up or warn others about unsafe water.
Next Steps
After you finish testing, take care of your equipment and look at your data. Follow these steps to keep your results correct:
-
Take photos and compare readings with a freshly calibrated device.
-
Clean and recalibrate your sensors if you need to.
-
Store your analyzer in a dry, safe place and recharge or remove batteries.
-
Write down everything you did, including any problems or surprises.
These steps help you keep your analyzer working well and make sure your data stays good for future tests.
You can make field testing easy and trustworthy with portable multi-parameter water quality analyzers. Get your equipment ready, calibrate sensors, and handle samples gently. This keeps sensors working well and your data correct. People who do these things get better results and trust their numbers.
-
Cleaning and taking care of your analyzer helps it last longer.
-
Take out batteries when storing and check seals to stop problems.
-
Write down calibration and site info to keep track of your data.
Keep learning and use these steps each time you test water. You will get better at testing and always have good results.
FAQ
How often should you calibrate your portable water quality analyzer?
Calibrate your analyzer before every field trip. Most sensors need calibration once a month. Always look at your user manual for the right schedule. Regular calibration helps you get correct results each time.
What should you do if your analyzer gives strange readings?
Start by cleaning your sensors with distilled water. Next, recalibrate your analyzer. If it still acts up, check for broken cables or weak batteries. Always use the troubleshooting steps in your manual.
Can you use the analyzer in saltwater and freshwater?
Yes, most portable analyzers work in saltwater and freshwater. Rinse the sensors with clean water after each use. This stops buildup and keeps your readings right.
What is the best way to store your analyzer after field testing?
Keep your analyzer in a dry, safe spot. Take out the batteries if you will not use it soon. Clean and dry the sensors before you put it away. Use the waterproof case to keep dust and moisture out.
https://www.schinstrument.com/portable-multi-parameter-water-quality-analyzer-field.html